Articles by "eyecandy"
Showing posts with label eyecandy. Show all posts
Are you using Ubuntu from a long time and you really miss those old days? Sam Hewitt has forked Elementary OS Gtk theme and icons to make it look and feel like old Ubuntu 8.04. It's all about old school brown-y orange-y themes and gave it a name "Humanitary" theme & icons, Gtk theme made using neutral grey & brown palette and icons using a neutral palette. Since this theme is intended to use in Elementary OS which uses Pantheon[1] desktop but you can use it in Ubuntu or Linux Mint if you are using Gnome Shell, As I tested Gtk theme is not compatible with other desktops. Vertex and Masalla icons used in the following screenshots. You can use Unity Tweak ToolGnome-tweak-tool or Ubuntu-Tweak to change themes/icons

Install Conky-Two in Ubuntu 12.10/Ubuntu 12.04/Ubuntu 11.10/any Ubuntu Version/Linux Mint/Fedora/Any Linux Distro

NoobsLab have Conky Collection for Linux Distro's. This Conky-Two is really beautiful desktop gadget, NoobsLab modified this gadget and make this available for wifi and ethernet. It support all Linux environments (Gnome Shell, Unity, Cinnamon, Gnome Classic, Mate, and others). It shows System Info (Cpu, Ram, Swap, System Uptime, Processes, Linux Version), Hard Drive Usage (Root, Home), Network (Count Received/Sent data, Shows current up/down speed), Time, Day, Date, Laptop Battery.
conky

Install Conky in Ubuntu/Linux Mint open terminal (Press Ctrl+Alt+T) and copy the following commands in the Terminal:

First of all Download Startup script with following commands:

Now open Startup Applications > click Add  > New Dialog box will open click on Browse > Now (Press Ctrl+H) see following screenshot.
conky startup


1: Conky-Two for Wifi
conky

for (Unity, Gnome Classic, Mate, and other):
To install Conky-Two in Ubuntu/Mint open Terminal (Press Ctrl+Alt+T) and copy the following commands in the Terminal:

for (Gnome Shell and Cinnamon):
To install Conky-Two in Ubuntu/Mint open Terminal (Press Ctrl+Alt+T) and copy the following commands in the Terminal:


2: Conky-Two for Ethernet
conky

for (Unity, Gnome Classic, Mate, and other):
To install Conky-Two in Ubuntu/Mint open Terminal (Press Ctrl+Alt+T) and copy the following commands in the Terminal:

for (Gnome Shell and Cinnamon):
To install Conky-Two in Ubuntu/Mint open Terminal (Press Ctrl+Alt+T) and copy the following commands in the Terminal:
That's it
Source: Conky Two
Install Cinnamon 1.3.1 on Ubuntu 12.04 Precise/Ubuntu 11.10/11.04/Linux Mint/Fedora/other Distro's

Cinnamon team released new version of Cinnamon 1.3.1 with many bugs fixes, theme improvements, enhancements to the bottom panel, also include cinnamon setting manager. Version 1.3.1 is a maintenance release which adds polish and tackles important issues from the previous release.

cinnamon

cinnamon desktop

New Fixes in Cinnamon 1.3.1:

Easier applet drag n’ drop:
  1. Panel zones now cover the entire panel: In Cinnamon 1.3 they only used the space they needed, leaving empty zones in the panel which didn’t react to drag n’ drop.
  2. Panel zones are now highlighted on drag-over: In Cinnamon 1.3, you couldn’t see where the zones were, so dragging an applet was precarious as you couldn’t tell whether you were dropping it in the right or center zone (for instance). Since version 1.3.1, they now appear in color. This works with the default theme, and this post contains instructions for artists to update their theme to add this feature.
Cinnamon settings:
  1. New “restore to default” button in the applet section
  2. Text scaling factor now uses a spin button instead of a scale widget
  3. Slightly improved layout
Default theme improvements:
  1. Slightly better looking panel launchers
  2. Smoother notifications
Other fixes:
  1. Fixed battery/power applet
  2. Many unnecessary warnings were removed from the logs
  3. Typos were corrected in the systray applet
  4. A bug was fixed which made some icons to appear too big in the system tray

To install Cinnamon on Ubuntu open Terminal (Press Ctrl+Alt+T) and copy the following commands in the Terminal:


Install on Linux Mint with following command:


Install on Fedora 16 Verne with following commands:


For other Distro's see Cinnamon Download Page.

Install Gnome Pie 0.3 on Ubuntu 11.10 Oneiric/Other Ubuntu Versions/Linux Mint

gnome pie linux

gnome pie ubuntu

What's new in Gnome Pie 0.3 Version?
There are many new features in Gnome-Pie which want to be released! Again a lot has been done in the last three weeks. Read on to see what changed.
  • Mouse bindings: The most requested feature ever: Pies can now be bound to any button of your mouse!
  • Turbo bindings: For each Pie it’s now possible to select whether it should automatically close when it’s hotkey is released. The global turbo mode does not exist anymore.
  • Delayed bindings: You can make any Pie being triggered delayed. This is very useful: So you can even bind Pies to, for example, your right mouse button. When you press it normally, a common right click will be executed, if you hold it down for a moment, the pie will open. Or you can assign Pies to common key strokes like Ctrl-Z. The hotkey will be still usable.
  • Window management: There is a brand new slice group which acts like Alt-Tab: It displays all your opened windows!
  • Translations: Gnome-Pie has been translated to Italian, Brazilian Portuguese and German. Thanks a lot to Gr3yFox and magnunleno!
  • New theme: I created a new theme which reminds of the Elementary OS!
  • Memory management: Gnome-Pie uses much less memory now! A typical session should use around 15 MB.
  • Bug fixes: And, of course, many minor bugs have been fixed. For example settings are now saved when the user quits the configuration dialog via the title bar close button as well. And it’s not possible anymore to assign the same hotkey twice.
  • Precise packages: For early adopters: The PPA for Ubuntu has been updated with packages for Ubuntu 12.04!

To install Gnome Pie on Ubuntu/Linux Mint open Terminal (Press Alt+F2 and type: gnome-terminal -or- Press Ctrl+Alt+T) and copy the following commands in the Terminal:


Here is the Homepage of GnomePie. That's it, Enjoy
Enable Compiz Desktop Cube in Ubuntu 12.10 Quantal/Ubuntu 12.04 Precise/Ubuntu 11.10 Oneiric/Linux Mint
desktop cube

1.) First of all, check if your machine support compiz effects or not. Run the following command in a terminal:


You will get the similar output, all “yes” means it works perfectly.
Not software rendered: yes
Not blacklisted: yes
GLX fbconfig: yes
GLX texture from pixmap: yes
GL npot or rect textures: yes
GL vertex program: yes
GL fragment program: yes
GL vertex buffer object: yes
GL framebuffer object: yes
GL version is 1.4+: yes
Unity 3D supported: yes

2.) Now install and launch CCSM:


All settings will be done in ccsm.

3.) In CompizConfig Settings Manager, click to go into General Options -> Desktop Size. Set Horizontal Virtual Size to 4, Vertical Virtual Size to 1 and Number of Desktops to 4.
desktop cube

4.) Now, check Desktop Cube and Rotate Cube. Your desktop may mess up or even freeze with no window border, can’t move and resize windows. Don't worry, check Window Decoration, Move Window, and Resize Window at next boot by running ccsm at a terminal (Ctrl+Alt+T)
desktop cube

5.) Then click on Desktop Cube > Appearance Tab > set following setting
cube

6.) Then move to Transparent Cude Tab and change first Opacity to 50
cube

7.) If you still can’t get it work, use following commands to remove all previous settings. And finally restart.
rm -rf .gconf/apps/compiz*
rm -rf .cache/compizconfig-1/
rm -rf .config/compiz-1/
rm -rf .compiz*
Install Pantheon Theme for Gnome Shell 3.2 on Ubuntu 11.10 Oneiric Ocelot/Fedora

Installation of Gnome Shell Themes:
  • Backup /usr/share/gnome-shell/theme folder
  • Extract the archive and rename gnome-shell to theme
  • Copy this folder to /usr/share/gnome-shell/
  • Restart Gnome Shell by hitting Alt+F2, then type 'r' and Press Enter
  • You can also use Gnome Tweak Tool to install directly from zip file
You can also install theme selector extension and use gnome tweak tool to switch themes. Follow the instructions below (for Ubuntu 11.10 Oneiric Ocelot):
  • Run the following command: sudo apt-get install git-core
  • Install Gnome Tweak Tool by running following command: sudo apt-get install gnome-tweak-tool
  • Download Gnome Shell extensions by running following command: git clone git://git.gnome.org/gnome-shell-extensions
  • Now access the directory from terminal by running following command: cd gnome-shell-extensions/
  • Finally run this command to install the extension: ./autogen.sh --prefix=$HOME/.local --enable-extensions="user-theme"
  • Logout, come back and use Gnome Tweak Tool to switch themes.
Here is the Guide to Install Gnome Tweak Tool.

ubuntu gnome shell themes

fedora shell themes
  • gnome-shell 3.2.0 or higher
  • gnome-shell-extension-common 3.2.0 or higher
  • Droid-Sans fonts were strongly recommended since it must be the default fonts for elementary.
  • gdm 3.2.0 or higher
Download Pantheon Theme from Gnome-Look Link
Install Tron Legacy and Aqua Themes for Gnome Shell 3.2 (Ubuntu/Fedora)

Installation of Gnome Shell Themes:
  • Backup /usr/share/gnome-shell/theme folder
  • Extract the archive and rename gnome-shell to theme
  • Copy this folder to /usr/share/gnome-shell/
  • Restart Gnome Shell by hitting Alt+F2, then type 'r' and Press Enter
  • You can also use Gnome Tweak Tool to install directly from zip file
You can also install theme selector extension and use gnome tweak tool to switch themes. Follow the instructions below (for Ubuntu 11.10 Oneiric Ocelot):
  • Run the following command: sudo apt-get install git-core
  • Install Gnome Tweak Tool by running following command: sudo apt-get install gnome-tweak-tool
  • Download Gnome Shell extensions by running following command: git clone git://git.gnome.org/gnome-shell-extensions
  • Now access the directory from terminal by running following command: cd gnome-shell-extensions/
  • Finally run this command to install the extension: ./autogen.sh --prefix=$HOME/.local --enable-extensions="user-theme"
  • Logout, come back and use Gnome Tweak Tool to switch themes.
Here is the Guide to Install Gnome Tweak Tool.

1: Tron Legacy Theme for Gnome Shell

fedora Gnome Shell Themes

This is a GNOME Shell theme inspired by the film Tron Legacy.
Compatibility: GNOME 3.0.x/3.2.


2: Aqua Theme for Gnome Shell

ubuntu gnome shell themes

Aqua is a subtle light theme for Gnome Shell (Too much light?). The theme is compatible with the latest Gnome Shell 3.2.
or Install by following commands:


Install Evolve theme for Ubuntu 11.10 Oneiric Ocelot Unity

Evolve is a simple and minimal light theme for Gnome. The theme is compatible with the latest GTK 3.2 and uses the Adwaita engine. It also includes a GTK 2.0 theme suing Murrine engine.

Ubuntu 11.10 Themes


Installation Instructions
  • Extract the zip file. Then extract the tar.gz file to the themes directory i.e. "~/.themes/" or "/usr/share/themes/"
  • Now use Gnome Tweak Tool to switch both metacity and GTK Theme.
  • If you are using Unity, then logout and relogin.
Installation Instructions for other distros:
  • Extract the zip file. Then extract the tar.gz file to the themes directory i.e. "~/.themes/" or "/usr/share/themes/"
  • Use Gnome Tweak tool to choose the themes, or run the following commands in Terminal,
  • gconftool-2 -s --type string /apps/metacity/general/theme "Evolve"
  • gsettings set org.gnome.desktop.interface gtk-theme "Evolve"
Download Evolve Theme for Ubuntu 11.10 Unity
or Install by following commands:


VDesk Animated Wallpapers/Videos for Ubuntu 11.10 Oneiric Ocelot/Fedora/Linux Mint/Other Ubuntu Versions

Introduction
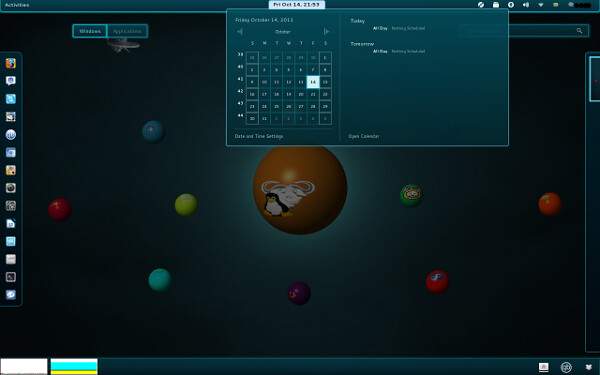
VDesk is a frontend for xwinwrap which allows you to have a screensaver
or video as a desktop wallpaper. Others may refer to this as animated
desktop, animated background or video desktop. The use of VDesk depends
on zenity, xwinwrap, mplayer and screensavers. I hope that you will find
VDesk a suitable frontend for xwinwrap, containing all the features that
you would hope to find. We have strived to make VDesk user friendly and
highly configurable.

animated wallpapers Ubuntu Linux

Version 1.3
- Released June 1 2011
- Rewrote installer
- Added uninstall
- Remove radio buttons from Video Options
- Added Mplayer Profile support
- Fixed bug that caused transparency local variable mismatch
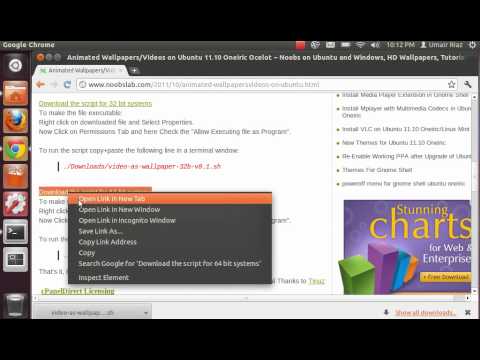
>> Download and Install VDesk from Gnome-Look
Extract Files and open Terminal go to VDesk folder and enter the following command:


VDesk Usage Options:

A. Play Video
|-> - Select a video to use as your Visual Desktop Background from one of the
available videos in the list.

B. Screen Saver
|-> - Select a Screen Saver to use as your Visual Desktop Background from one
of the available screen savers in the list.

C. Stop
|-> - Stop VDesk

D. Video Options
|-> - These are in-play settings that apply only to video playback.

1. Set Volume
|-> - Set in-play volume

2. Mute / Unmute
|-> - Mute / Unmute current video playback

3. Pause / Unpause
|-> - Pause / Unpause current video playback

4. Change Track
|-> - Cycle through available audio tracks for the current video

E. Configuration

1. Video Directory
|-> - Select a directory to load videos from. The default directory is ~/Videos

2. Screen Saver Directory
|-> - Select a directory to load videos from. The default directory is /usr/lib/xscreensaver

3. Video Transparency
|-> - Set the transparency for video playback. The default value is 100,
or no transparency. This offers the best picture quality but obfuscates
all desktop icons. Be sure to test optimal settings and remember that
when you set a transparency, your desktop wallpaper (image or solid color)
will effect the video appearance.
|---> - This is not an in-play option

4. Screen Saver Transparency
|-> - Set the transparency for screen saver background. The default value
is 100, or no transparency. This offers the best picture quality but can
obfuscate all desktop icons. Some screen savers have totally transparent
backgrounds and others do not. Be sure to test optimal settings and remember
that when you set a transparency, your desktop wallpaper (image or solid
color) will effect the screen saver appearance. Play around with various
screen saver / wallpaper combinations as there will undoubtedly be some
combinations that work very well together, and some that are awful.
|---> - This is not an in-play option

5. Mplayer Profile
|-> Enter the desired profile name as it appears in your Mplayer config
file. Be sure to leave out the [] from the name. This option allows you
to use a configuration that is hardware accelerated. Consult Mplayer
docs for instructions on creating a profile.

6. Default Volume
|-> - Set a default volume for video playback

7. Auto Start
|-> - Starts selected background at user login
|---> a) Activate
|---> - Select a Video or Screen Saver to initiate at login. To
change the directory you are selecting files from, you must
use the Configuration Option for directory selection.
|---> b) Deactivate
|---> - Turns off the auto start function

8. Reset to Defaults
|-> - Reset all configuration settings to default values. This is helpful if
something goes wrong. I believe that I have worked out all of the bugs in this
release, but it is possible that something was missed.

Here is VDesk Author in Gnome-Look for support and troubleshoot.
Animated Wallpapers/Videos on Ubuntu 11.10 Oneiric Ocelot
Installing all the needed files is very easy… all you have to do is to download my script and save it in your Downloads folder, make the file executable and then run the script!!

The script will install the following needed packages: mplayer, zenity and xwinwrapcvs. When these packages are installed the downloaded xwinwrapcvs.deb file will be deleted and the script will then move the video-wallpaper-script to the nautilus script folder. After each step the used files will be deleted from your system except the video-wallpaper-script.sh located in your Downloads folder.

To use the script click with your right mouse button on your desktop and select Scripts -> video-wallpaper-script. Then browse to the location of the video file you want to use, select the video and click on the OK button and the video will be used as a wallpaper.

If you have no panels on your desktop just press the SuperKey to start a program or press Alt+Tab to select any open folder or running program. This will only happen when you click on an empty desktop. I am still working on fixing this but this is the first version of the script. When it’s fixed i will let you know how to fix it….

Please note that not all video formats can be used and you kinda have to figure out what formats work or not… Some nice and working videos you can download from dreamscene.org

>> Download the script for 32-bit systems from Skydrive
To make the file executable:
Right click on downloaded file and Select Properties.
Now Click on Permissions Tab and here Check the "Allow Executing file as Program".

To run the script copy+paste the following line in a terminal window:


>> Download the script for 64-bit systems from SkyDrive
To make the file executable:To make the file executable:
Right click on downloaded file and Select Properties.
Now Click on Permissions Tab and here Check the "Allow Executing file as Program".

To run the script copy+paste the following line in a terminal window:


That's it, Enjoy.
Special Thanks to Tinuz for Script
Install Alternative Status Menu with Power Options for GNOME Shell Extension on Ubuntu 11.10 Oneiric Ocelot

Power off Extension Gnome Shell

This is very cool Status menu Extension for Gnome Shell, In this menu you will get "Power off" and  "Hibernate" Options which is very good. Alternative Status Menu GNOME Shell Extension is for those who want those items visible all the time.

It replaces GNOME Shell status menu with one featuring separate Suspend and Power Off. Adds the ability to hibernate as well. The PPA for this Extension is available by ferramroberto.
>> To install Status Menu for Gnome Shell in Ubuntu Oneiric open Terminal (Press Alt+F2 and type: gnome-terminal -or- Press Alt+F2) and copy the following commands in the Terminal:


That's it, Enjoy.
Install Beautiful Themes for Gnome Shell in Ubuntu 11.10 Oneiric Ocelot/Fedora

How to Install Gnome Shell Themes in Ubuntu Oneiric/Fedora:
  • Backup /usr/share/gnome-shell/theme folder
  • Extract the theme archive and rename gnome-shell to theme
  • Copy this folder to /usr/share/gnome-shell/
  • Restart Gnome Shell Press Alt+F2, then type r and press enter
  • You can also use Gnome Tweak Tool to install directly from the archive.
  • You can install Theme Selector.

1: Tronny Gnome Shell Theme


Tronny is Gnome Shell theme by rvc-2011 based on original Tron Legacy theme by half-left. Tronny is fully compatible with Gnome 3.2 so you can get it working under latest Ubuntu 11.10.


>> Download Tronny Gnome Shell Theme


2: Black Glass Gnome Shell Theme


Black Glass theme is another cool Gnome Shell theme made by deviantARTist shule1987.


>> Download Black Glass Gnome Shell Theme


3: Metal X Gnome Shell Theme


Metal X Gnome Shell theme by justviper gives your shell clean and polished metallic look

>> Download Metal X Gnome Shell Theme


4: Elementary Viper Luna Gnome Shell Theme


Elementary Viper Luna Gnome Shell theme is inspired by DanRabit's work on Elementary Luna desktop. The theme is created by justviper.

>> Download Elementary Viper Luna Gnome Shell Theme


5: GnomeOrg Gnome Shell Theme


Justviper has created another nice and clean Gnome Shell theme, this time based on the design of official Gnome website.

>> Download GnomeOrg Gnome Shell Theme


6: Adwaita White Gnome Shell Theme


Adwaita-White Gnome Shell theme by deviantARTist Oberon27 blends nicely with Adwaita Theme and gives a consistent look for your all over Gnome 3 experience.


>> Download Adwaita White Gnome Shell Theme


7: eOS Gnome Shell Theme


eOS Gnome Shell theme by 0rAX0 is yet another equally beautiful theme inspired by Elementary desktop and features a Plank like dock and designs from Pantheon Shell and Wingpanel.

>> Download eOS Gnome Shell Theme


7: Ubuntu Ambiance Gnome Shell Theme


Half-left has designed a new theme for Gnome Shell based on the Default Ambiance theme in Ubuntu. The theme looks great and if you use Gnome 3 PPA in Ubuntu 11.04, it would nicely integrate with your desktop.


Enjoy.
Install Sushi File Previewer for Gnome in Ubuntu 11.10 Oneiric Ocelot/Linux Mint

sushi previewer

sushi for ubuntu oneiric

Sushi previewer is now available in the Ubuntu 11.10 Oneiric Ocelot repositories!

Sushi is a new GNOME 3.2 tool similar to Gloobus Preview that provides quick file previews. To use it, select a file in Nautilus and then press the SPACE bar.

Sushi works with both Unity and GNOME Shell and it actually doesn't depend on Nautilus so other file managers can make use of it.

Sushi is GtkClutter and Javascript-based and supports all kind of files like images, documents, PDFs, fonts, sound (by the way, you can't preview sound files by hovering them in Nautilus 3.2 like in older Nautilus versions) and video files, some text files and more.

To install Sushi Previewer on Ubuntu/Linux Mint open Terminal and copy the following command in the Terminal:


To use it, select a file (like a picture, sound file, etc.) and press the SPACE key. To close the preview, you can either press the SPACE key again or click the close button.
Note: after installing it, you may need to run "gnome-sushi" in a terminal to get it to run (or you can simply log out and log back in).
That's it, Enjoy
Install Faenza Icons in Ubuntu 11.10 Oneiric Ocelot/Linux Mint


Here you will see how to install faenza icons using the tiheum equinox ppa and gnome tweak tool.

To install Faenza Icons open Terminal and copy the following commands in the Terminal:


Now you need to install Gnome Tweak Tool copy the following command in the Terminal:


When installation finished, Now open the Advance Setting of Icons. To open Advance settings Press Super key and type: advanced settings click the launcher and do what you want to do with icons. After done your work logout and login again to see your changes.
That's it, Enjoy
Installation and Enable the XScreen Saver in Ubuntu 11.10 Oneiric Ocelot/Linux Mint

To install and enable the XScreenSaver open a Terminal and copy the following commands in the Terminal:


Now remove gnome-screensaver


Now start the xscreensaver configuration tool using a terminal:


Click OK to both prompts asking to turn-off Gnome Daemon and to start xscreensaver-daemon respectively.

To create a rule to start the xscreensaver daemon on login, click on the Dash home launcher and type: startup applications. Click on the Add button and enter a name for the rule and to start XScreenSaver on login use this command:


That's it, Enjoy