
Extensions PPA Available by Webupd8
1: Install Weather Extension for Gnome Shell

To install Weather extension open Terminal (Press Ctrl+Alt+T) and copy the following commands in the Terminal:
How to configure GNOME Shell Weather Extension
1. To get your Yahoo ID, go to http://weather.yahoo.com, enter your city/zip code and when you find it, look for the orange "RSS" icon on the right. Hovering this icon, you'll see your code - this is the WOEID.
2. Enter the following command in terminal with your Area "WOEID".
When you click on RSS icon, You'll see this URL in address bar
For Example: http://weather.yahooapis.com/forecastrss?p=BUXX0005&u=f (See picture Below)
The Red Color is "WOEID" code.
Now Restart your Gnome Shell (Press Alt+F2 and type: 'r') or Logout and Login back.

3. Click the extension icon on the top bar and select "Preferences". Select your settings you want.
4. Now install GNOME Tweak Tool:
From Gnome-Tweak-Tool Enable your Weather Extension.
Here is the page of Weather Extension on Github.
2: Install AutoHide Top Bar Extension for Gnome Shell
To Install AutoHide Top Bar open Terminal (Press Ctrl+Alt+T) and copy the following commands in the Terminal:
Note: If you've installed the original Autohide Top Bar extension, remove it before installing this one!
When installation complete, restart GNOME Shell (Press Alt+F2 and type: 'r' Press Enter) and activate the extension using GNOME Tweak Tool.
Note: If toggling autohide on/off doesn't work properly or you just want to change the value, open "extension.js":
And increase the "const TIME_DELTA" value to something that works for you.
3: Install Windows Overlay Icons Extension for Gnome Shell
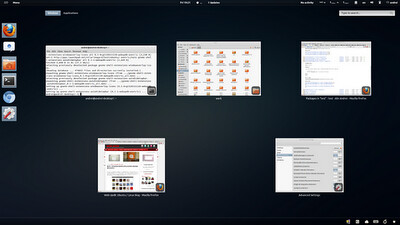
Window Overlay Icons is an extension that displays an icon for each window in the activities overview, which makes it easier to distinguish the applications. The extension has been recently updated to work with GNOME Shell 3.2.
Note: this extension is incompatible with the native window placement extension.
To Install Window Overlay Icons open Terminal (Press Ctrl+Alt+T) and copy the following commands in the Terminal:
When installation complete, restart GNOME Shell (Press Alt+F2 and type: 'r' Press Enter) and activate the extension using GNOME Tweak Tool.
4: Install Hamster Applet Extension for Gnome Shell
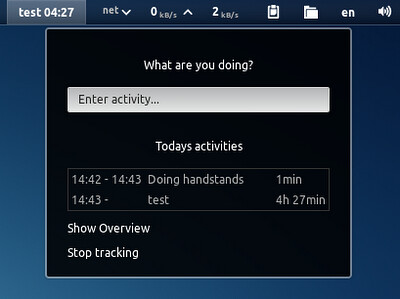
Hamster (time tracking tool) is available for GNOME Shell. Unfortunately, its functionality is very limited for now (because it's still work in progress): you can only search and see the latest activity on the panel. To add a new activity click "Show Overview".
To Install Hamster Applet open Terminal (Press Ctrl+Alt+T) and copy the following commands in the Terminal:
When installation complete, restart GNOME Shell (Press Alt+F2 and type: 'r' Press Enter) and activate the extension using GNOME Tweak Tool.
5: Install Update Indicator Extension for Gnome Shell

Updates Indicator GNOME Shell extension displays new updates on the GNOME Shell top bar. Using it, you can see a list of available updates, update the software sources or install the updates with a single click.
To Install Update Indicator open Terminal (Press Ctrl+Alt+T) and copy the following commands in the Terminal:
When installation complete, restart GNOME Shell (Press Alt+F2 and type: 'r' Press Enter) and activate the extension using GNOME Tweak Tool.
6: Install Extended Places Menu Extension for Gnome Shell
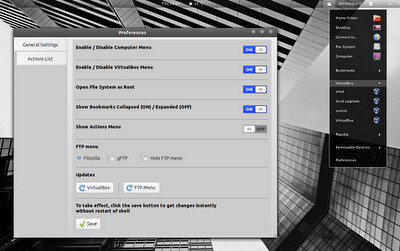
Extended Places Menu is a new GNOME Shell extension based on the official Places Menu extension, but with some extra features like:
- Open file system as root.
- Submenu for quickly launching Virtual-box machines (can be enabled/disabled in the preferences).
- Submenu for FTP sites (can be enabled/disabled in the preferences) - supported clients: Filezilla and gFTP.
- Collapse-able bookmarks.
- A submenu for custom actions that you can define in the preferences.
Also, if you've manually installed the extension, remove the files before installing the package in the WebUp8 PPA, most importantly /usr/local/share/glib-2.0/schemas/org.gnome.shell.extensions.places-menu-extended.gschema.xml - the PPA package installs this under /usr/share/glib-2.0/schemas because Launchpad doesn't allow files under /usr/local.
To Install Extended Menu Places open Terminal (Press Ctrl+Alt+T) and copy the following commands in the Terminal:
When installation complete, restart GNOME Shell (Press Alt+F2 and type: 'r' Press Enter) and activate the extension using GNOME Tweak Tool.
7: Install System Monitor Extension for Gnome Shell
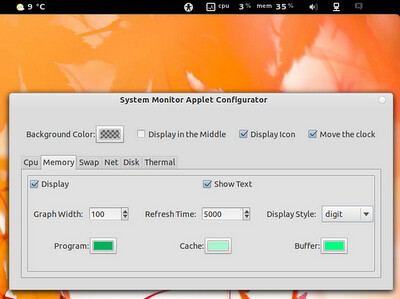
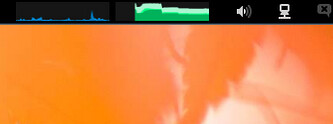
GNOME Shell System Monitor is a highly configurable system monitor extension for GNOME Shell (do not confuse this with the official System Monitor extension!). It can display the CPU, RAM, Swap, Network or disk usage on the top GNOME Shell bar, either as a graph or digits (or both) and you can customize the colors, position and more.
To Install System Monitor open Terminal (Press Ctrl+Alt+T) and copy the following commands in the Terminal:
When installation complete, restart GNOME Shell (Press Alt+F2 and type: 'r' Press Enter) and activate the extension using GNOME Tweak Tool.
8: Install Notifications for Pidgin for Gnome Shell
In GNOME Shell 3.2 you can reply to chat from the popup notifications, but that only works for Empathy by default. So here is a GNOME Shell extension that does the same thing but for Pidgin.
Note: To avoid getting both the standard Pidgin notifications and the new ones, in Pidgin select Tools > Plugins and uncheck the box next to "Libnotify Popups".
To Install Pidgin Notifications open Terminal (Press Ctrl+Alt+T) and copy the following commands in the Terminal:
When installation complete, restart GNOME Shell (Press Alt+F2 and type: 'r' Press Enter) and activate the extension using GNOME Tweak Tool.
9: Install Jupiter (Long Battery) for Gnome Shell

To Install Jupiter open Terminal (Press Ctrl+Alt+T) and copy the following commands in the Terminal:
If you have an EeePC, also install the following package for SHE support:
Logout and Login back to See in Jupiter.
10: Xrandr Indicator (Monitor Status Indicator) Extension Gnome Shell
Adds a systems status menu for rotating monitors (overrides what is currently provided by gnome-settings-daemon).
To Install Xrandr Indicator open Terminal (Press Ctrl+Alt+T) and copy the following commands in the Terminal:
When installation complete, restart GNOME Shell (Press Alt+F2 and type: 'r' Press Enter) and activate the extension using GNOME Tweak Tool.
11: Auto Move Windows Gnome Shell
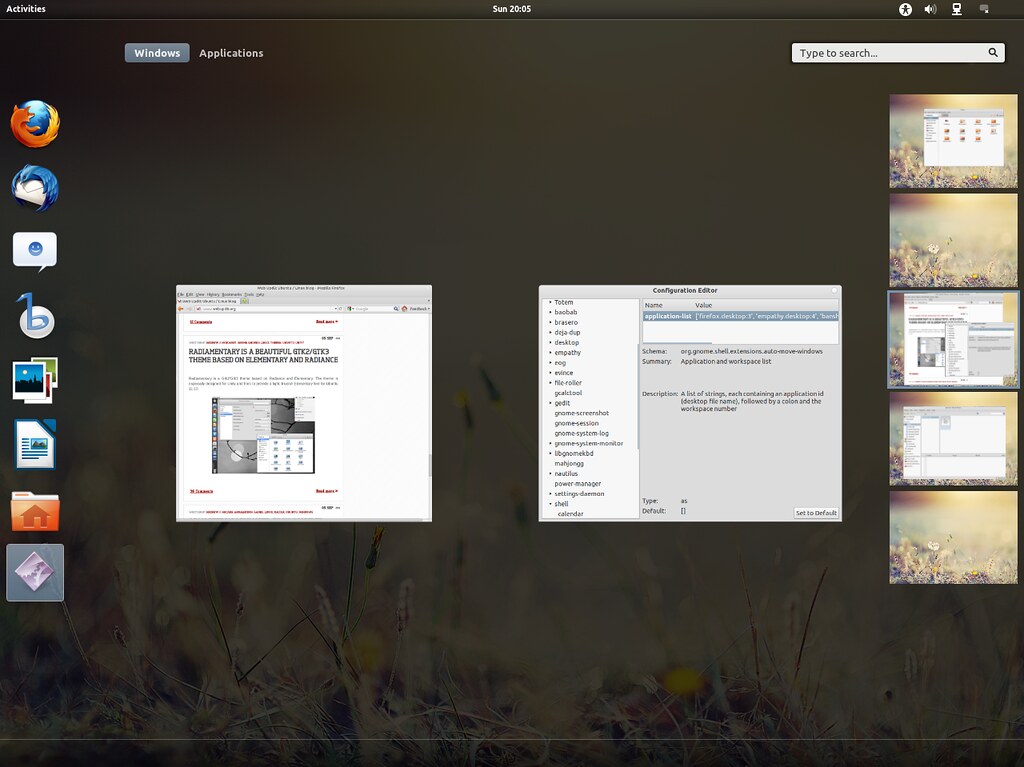
GNOME Shell Auto Move Windows extension can be used to get some applications to always start on a specific workspace.
This extension can be used to get some applications to always start on a specific workspace.
To Install Auto Move Windows open Terminal (Press Ctrl+Alt+T) and copy the following commands in the Terminal:
When installation complete, restart GNOME Shell (Press Alt+F2 and type: 'r' Press Enter) and activate the extension using GNOME Tweak Tool.
12: Windows Navigator Gnome Shell
Windows Navigator extension allow keyboard selection of windows and workspaces in overlay mode: when you hold the ALT key, a number is assigned to each window (displayed in the top left corner) and you can then press the number to switch to that window.
To Install Auto Move Windows open Terminal (Press Ctrl+Alt+T) and copy the following commands in the Terminal:
When installation complete, restart GNOME Shell (Press Alt+F2 and type: 'r' Press Enter) and activate the extension using GNOME Tweak Tool.
13: Easily Change Gnome Shell Themes
To be able to easily change the GNOME Shell theme, besides GNOME Tweak Tool you'll also need the User Theme extension.
Use GNOME Tweak Tool to activate the theme.
