Articles by "brightness"
Showing posts with label brightness. Show all posts
Well, you can adjust your screen brightness for your eyes but at some point. Dimmer lets you make your dark screen to darker. It is a free utility for setting the brightness of your main screen as well as external monitors. You can choose which screens will be set to the selected brightness level. Perfect for dark room, planetariums or anyone working in the dark with multiple monitors. For video presentations use dimmer to dim your laptop screen, while leaving the VGA output at full brightness on the projector. From the system tray you access Dimmer slider, the range from 0% (Means full brightness) to all the way to 100%.

dimmer linux

Features:
  • Cross-Platform: Available for Linux, Mac OS X and Windows.
  • Lean: Small resource footprint, minimal User Interface.
  • Unobtrusive: Settings are persisted and restored per-Display without any configuration.
  • Smart: Disconnecting and reconnecting external displays are handled seamlessly.
  • Open Source: GitHub-based workflow, MIT licensed.

You can Download deb files for Debian/Ubuntu/Linux Mint and other packages also available for other Linux distributions, as well as source code so you can compile it.

Download Dimmer

If you are using Linux on your Laptop then you have been using builtin brightness functionality which doesn't offer much but to increase and decrease brightness. Brightness Controller offers more functionality than builtin one, it is written in Python programming language and Pyside, it works with Pyton2 version.
It lets you control the brightness, Color temperature of the display and RGB as well. You can control all these values from 1% to 100%, apart from hardware brightness control which lets you control the brightness like 10% 20% 40% and so on. It should be mentioned that it changes the present brightness value set via hardware control of your monitor. For example, if you set your Monitor's brightness to 50% using hardware buttons, then that will be the 100% value in Brightness controller. It also supports arbitrary number of displays, further more you can save current configuration profile and load them as you need.


How To Install?

Available for Ubuntu 17.04 Zesty/16.10 Yakkety/16.04 Xenial/14.04 Trusty/Linux Mint 18/17 and other related Ubuntu derivatives
To install Brightness Controller in Ubuntu/Linux Mint open Terminal (Press Ctrl+Alt+T) and copy the following commands in the Terminal:
If you want to install it in other distribution then download source from here.
That's it
Yawls stands for Yet Another Webcam Light Sensor, it is a small Java program created for Ubuntu, it adjust the brightness level of your display by using the internal/externel webcam of your notebook as an ambient light sensor, that uses the OpenCV Library and designed to comfort and save energy of your laptop battery. Yawls can also be used from command line interface and run itself as a system daemon, two times a minute it runs and adjusts the brightness of the notebook screen with reference to the ambient brightness. It doesn't engage webcam constantly, as mentioned above in a 30 seconds interval it uses the webcam and leave it for other programs to use. The interval time can be adjust from GUI or from config file if you are using CLI version
It also has face detection option which can be useful if you sits in dark room and yawls can adjust screens brightness as per your needs, by default this option is disabled, you can enable if you intend to use it. After very first installation you must calibrate yawls otherwise it may not function properly. If it causes problem somewhere between usage then re-calibrate it. If you found any kind of bug in the application then report it via github or launchpad.


Installation:
It can be installed in Ubuntu 15.04 Vivid/Ubuntu 15.10/14.04 Trusty/Linux Mint 17.x/17/other related Ubuntu derivatives.
First of all you must enable universe repository from Ubuntu software sources then proceed to install this deb file.


What do you think about this application?
Are you a Laptop user who installed Linux and want to give it a try? There is no doubt that Linux is great operating system but still there are some small issues floating around and should be fixed. We hope these small issues will be fixed in future releases of Linux. Now a days many users who use other OS(s) migrate to Linux and most of the time very first distribution they install is Ubuntu because it is easy to setup, essential applications are included and it works out of the box for all kind of users.
Install WildGuppy in Ubuntu 14.04 Trusty/13.10 Saucy/13.04 Raring/12.10 Quantal/12.04 Precise/Linux Mint 16/15/14/13/other Ubuntu derivatives

WildGuppy automaticallly adjust the laptop's brightness, by using camera samples which is taken at a user definable interval. It allows to set brightness level from low '0' to maximum '100' from panel indicator, it can set minimum level e.g '20' and maximum level '70' which is completely depend on user choice. So camera will take samples once interval round is complete and it start interval again for next sample.
Panel indicator allows to set brightness level manually, whenever user choose this option then webcam won't take samples from webcam.
Another feature of this indicator is 'Feeling Lucky!', what it does is once user click on this option, at the same time it takes a sample from cam and set the right brightness level and stop sampling process.
Sometime we face common problems in Ubuntu, which can be easily fixed and you can save your Ubuntu from reinstall. So today NoobsLab decided to write about some fixes, which are common and many people face that problems on daily basis.

1) Fix: GTK custom theme(Metacity) in Ubuntu 13.04/12.10 for Gnome Shell
I experienced the same problem with metacity in Ubuntu 13.04/12.10 with Gnome Shell, I wasn't able to change metacity theme. So here is the simple fix for you guys. Here is bug reported on launchpad for this problem. If you create (.theme) directory in your home folder then maybe you will face this problem. Now you can fix it by create a link between themes directory.
Open Terminal (Press Ctrl+Alt+T) and copy the following commands in the Terminal:
Logout and Login back.


2) Fix: Can't Find Software Sources
This is known problem in some Ubuntu versions, Ubuntu Software Sources are not available for search or you can't find in menu. So here is simple fix for you guys.
Open Terminal (Press Ctrl+Alt+T) and copy the following commands in the Terminal:

software sources
Open Terminal (Press Ctrl+Alt+T) and copy the following commands in the Terminal:

Now change the line NoDisplay=true to NoDisplay=false in text file.
If you can't find that line, just add NoDisplay=false line in file.


3) Fix: dpkg error "trying to overwrite package2 which is also in package1"
This is common problem while installing packages in Ubuntu, This happens when some files are already installed in system and new installation trying to overwrite same files again then dpkg stop install new package. You see this kind of error in terminal:
dpkg: error processing /var/cache/apt/archives/package2 (--unpack):
trying to overwrite '/usr/share/app/data/package_file2', which is also in package package1 1.0
dpkg-deb: subprocess paste killed by signal (Broken pipe)
Errors were encountered while processing:
/var/cache/apt/archives/package2.deb
E: Sub-process /usr/bin/dpkg returned an error code (1)

This error is easy to fix. Open Terminal (Press Ctrl+Alt+T) and copy the following command in terminal but replace (package2 with your package name):


4) Fix: Ugly fonts in Ubuntu (KDE, Gnome, Unity)
If your installed Ubuntu and your system fonts are messed up/looks ugly. Then you need to edit fonts file. There are two solution for you guys.
1st: Solution
Open Terminal (Press Ctrl+Alt+T) and copy the following command in terminal:
Logout and login back.
If above solution doesn't work then move to 2nd solution.

2nd: Solution
Open Terminal (Press Ctrl+Alt+T) and copy the following command in terminal:

Copy these following lines in text file, save and close file then logout and login back.
<match target="font">
  <edit name="hinting" mode="assign">
   <bool>false</bool>
  </edit>
</match>


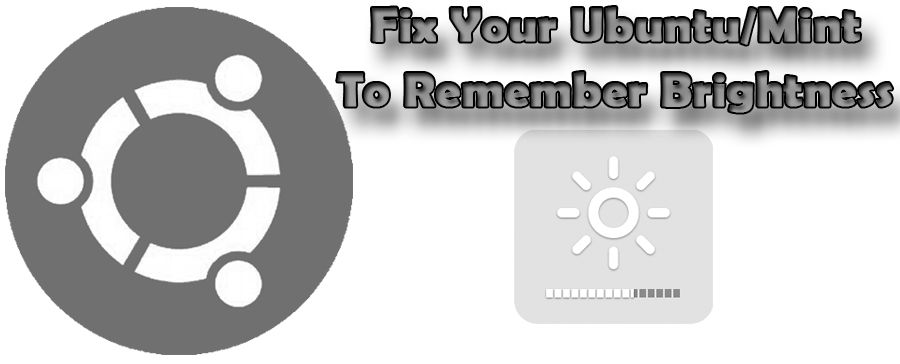
5) Fix: Unable to change Laptop Brightness in Ubuntu/Mint
If you are not able to increase or decrease your Ubuntu brightness then we have easy fix for you.
Open Terminal (Press Ctrl+Alt+T) and copy the following commands in the Terminal:

Now locate this line in opened text file GRUB_CMDLINE_LINUX="" and change this line to GRUB_CMDLINE_LINUX="acpi_backlight=vendor"
Save and close file.
Now run following command in Terminal to update grub:
Now restart PC.


6) Fix: "The system is running in low-graphics mode" error in Ubuntu/Mint
This is the most common error occurs in Ubuntu, There can be several reasons for this problem like: graphics drivers problem, display manager problem, etc.
There are two solutions for this problem:
1st: Solution (Lightdm invalid greeter)
When you are stuck at low graphics screen, just Press Ctrl+Alt+F1 and login with your user account and type the following command

Locate and change the line
greeter-session=something-greeter
to
greeter-session=unity-greeter

2nd: Solution (Install other Display Manager)
It is common problem display manager can be corrupt. So you can install alternative Display Manager.
If you have lightdm already installed then install gdm, just Press Ctrl+Alt+F1 and login with your user account and enter following command:
and console will ask to you set default display manager select GDM. Alternatively you can install KDM, just replace gdm with kdm and it will install kdm. After installation restart.


7) Tip: List all added PPA's in Terminal
If you want to check what third party PPA repositories are added in your sources list, just use this single command to list them all.
list ppa

Open Terminal (Press Ctrl+Alt+T) and copy the following commands in the Terminal:


8) Tip: Checkout package version and package belong to which PPA repository
If you want to find out some package version and package belongs to which repository, it is easy to find out via single command.
package ppa

Open Terminal (Press Ctrl+Alt+T) and copy the following command in terminal but replace (package-name) with your installed package:


9) Tip: Checkout package version and belong to which PPA repository, Show all startup programs in Startup Applications
If you can't find Startup-Application in Ubuntu/Linux Mint, just (Press Alt+F2) to run command and enter the following command to open Startup-Applications.

As you may know Ubuntu/Mint only shows few startup programs in (Startup Application), If you want to see all startup programs and to make changes with them.
startup programs

Open Terminal (Press Ctrl+Alt+T) and copy the following commands in the terminal:

If you want to hide those programs then use this command:
That's it